




10 recipes with food dryer
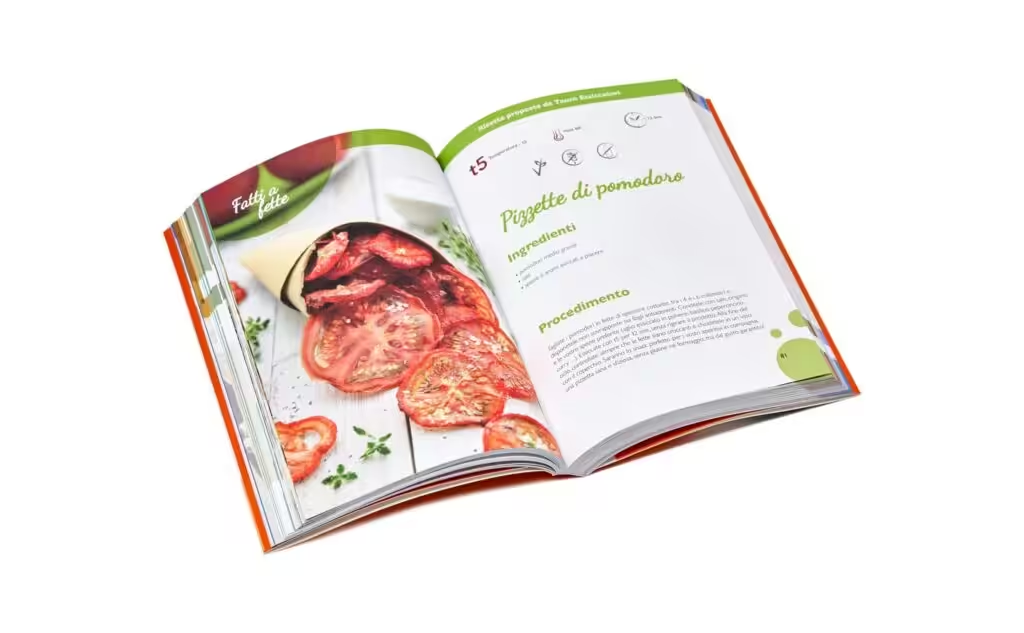
If the dryer is only switched on when apples or courgettes are left over, you are only using a fraction of its potential. Food dryer recipes make it possible to organise the larder, reduce waste and transform simple raw materials into healthy, stable and tasty preparations. But it is not just the machine that makes the difference: it is the cut, the thickness, the ripeness of the food and the correct management of time and temperature. This approach transforms drying from a simple emergency method to a true pillar of conscious domestic management, in true Tauro style.
Those who dry on a regular basis know this well. A tomato that is too watery requires patience, a badly cut apple dries unevenly, a cracker rolled out too thick remains soft in the middle. So it pays to start with recipes that are reliable, easy to repeat and really useful in everyday cooking. The horizontal airflow system, the heart of our Biosec dryers, ensures that each tray receives the same ventilation, eliminating the need to invert baskets and ensuring a professional result even at home.
Food dryer recipes worth preparing
Natural drying is not just conservation. It is a processing method that concentrates flavours and aromas, eases stock management and opens up interesting possibilities both at home and in the laboratory. Some preparations are immediate, others require a little more attention, but all have a real advantage: they allow food to be enhanced without forcing it through unnecessarily aggressive processes. Thanks to the programmes of the Dryset Pro system, it is possible to select the most suitable work logic for the product, respecting the raw material and optimising energy consumption, which in Biosec models oscillates on average between 15W and 350W.
1. Cinnamon apple chips
It is one of the simplest and most popular recipes. You choose hard-boiled apples, wash them well and slice them evenly, preferably between 3 and 5 mm. The skin can be left on, if the fruit is of good quality and untreated, as it is in the skin that many valuable fibres and nutrients are concentrated. A light sprinkling of cinnamon is enough to give character without covering the natural flavour.
The indicative temperature is around 50-55 °C (programme P1 or P2), with a time of 6 to 10 hours depending on the variety and initial moisture. The ideal result is flexible or crispy, depending on the final time. If a crispier chip is desired, it is necessary to extend the drying time slightly and perhaps carry out a final step with a higher temperature programme (P4 at 68 degrees) to remove the last residual moisture from the cellular tissues.
2. Dried tomatoes for the kitchen and pantry
Here, the raw material does it all. The tomatoes must be ripe but firm, fragrant and not overly watery. Elongated varieties, such as San Marzano, are ideal. They are cut in half or thickly sliced, some of the seeds are removed if necessary and they are placed on trays with the cut side up to avoid excessive juice loss during the early stages of the process.
A temperature between 55 and 60 °C (programme t4 or t5) is often a good basis. The times are variable, even 10-18 hours or up to 48 hours for tomatoes split in half. There is no equal time for all, because variety, size and season affect this. The right point depends on the end use: softer for dressings and jars in oil (after soaking in water and vinegar), drier for powders, chopped tomatoes and aromatic bases. Using the right temperature prevents excessive browning, preserving the bright red colour typical of lycopene.
3. Dried sliced courgettes
Courgettes yield well and lend themselves to a variety of uses. Thinly sliced, they become light snacks; cut a little thicker, they can be rehydrated and used in cooking for sauces or omelettes. They can be seasoned with a little salt, herbs or a dash of spices, but without overdoing it. When dried, the taste is drastically concentrated (ratio about 1:10), so the seasoning must be dosed very carefully so as not to upset the balance of the final product.
Working around 50-55 °C, the average time is 7-10 hours. If, after cooling, they still yield unevenly, it is worth extending. The check is always made when the product is cold, as soon as it comes out of the machine hot, as the residual heat temporarily makes the sugars and fibres flexible, distorting the perception of crispness.
4. Dried strawberries
Strawberries are delicate but very satisfying. They are washed quickly so that they do not absorb too much water, dried carefully and cut into even slices. The more regular the cut, the more even the drying will be. They are excellent on their own, in yoghurt, in breakfast mixes or to enrich doughs and fragrant herbal teas.
The temperature can remain between 45 and 50 °C (programme P2) to preserve aroma and colour well. The time is often between 6 and 12 hours. It depends very much on ripeness. Over-ripe strawberries give a stickier result due to the high sugar concentration; healthy, firm ones offer a better appearance and feel. For these preparations, the use of nets non-stick DrySilkNet is strongly recommended to facilitate detachment.
Savoury preparations and doughs for drying
When moving from fruit and vegetables to dough, the level of attention required changes. This is where thickness, density and ventilation come into play. This is where the dryer really shows its versatility, allowing you to create healthy alternatives to refined industrial products.
5. Seed crackers
It starts with flax, sunflower, sesame or pumpkin seeds, often combined with blended vegetables such as carrot or courgette. The mixture should be spread in a thin, even layer on the sheets non-stick DrySilk suitable for drying. If it is too thick, the outside dries out, creating a coraceous barrier, and the inside remains damp, risking the development of mould over time. If it is too liquid, the time is prolonged and the result loses its desired structure.
A temperature of around 42-45 °C (P3 BioCrudista programme) allows the dough to work well while keeping the enzymes and properties of the oil seeds intact. After a few hours, the dough can be cut with a knife or spatula to obtain regular portions once the process is finished. The total time varies, but often 8-14 hours are needed. They are a useful preparation for those looking for a more nutritious and less standardised snack than packaged products.
6. Vegetable sheets
Beetroot, carrot, tomato, pepper: blended with seeds or vegetable fibres they can become thin sheets to be used as a snack or creative base. This technique is perfect for recovering less noble parts or waste from other processes, such as the fibre resulting from juice extracts. It is also an interesting recipe for small artisan workshops, as it allows them to differentiate their offerings from simple ingredients.
The critical point here is the balance between the liquid and solid components. If the mixture is well balanced, drying proceeds smoothly and the sheet peels off the silicone or Teflon-coated substrates well. If, on the other hand, water prevails, the process becomes longer and the result less predictable. Horizontal drying allows the baskets to be lined without blocking the airflow, unlike vertical systems.
7. Vegetable burgers to keep
Not everyone thinks of the dryer for this use, but it can be very practical. Cooked pulses, squeezed vegetables and flavourings make it possible to create vegetable burgers that can be partially or completely dried. In the first case, you get a base to be finished on a griddle or in the oven, with a firmer outer texture. In the second, a more stable product, to be rehydrated or cooked later, ideal for travelling or trekking.
It is a preparation that requires testing and precision on dough density, so it is not the best place to start. However, it offers a real advantage to those who produce in small batches and want to better standardise consistency and shelf life by eliminating the free water that promotes bacterial spoilage.
Useful fruits, herbs and basics every day
Many of the best food dryer recipes are not created to impress, but to simplify everyday cooking. This is where drying really comes into its own, reducing waste and ensuring high quality ingredients are always ready.
8. Dried herb mix
Basil, sage, rosemary, oregano, thyme: harvested at the right time, preferably in the morning after the dew has evaporated, they maintain a much more faithful aromatic profile than products left to air-dry haphazardly, where dust and oxidation act undisturbed. The leaves should be cleaned well, dried and distributed without overlapping them too much.
Low temperatures, around 35-40 °C (programme P3 or t3), help to preserve volatile essential oils. The times are shorter than for fruit and vegetables (often 6-12 hours). Once ready and perfectly crisp, herbs should be stored whole in dark glass jars and crumbled only when needed, to minimise aroma dispersion.
9. Vegetable powder
Celery, onion, carrot, leek, tomato or mushrooms can become valuable bases for broths, seasonings and condiments. The vegetable cube Tauro, made at 100% from healthy peels and waste, is the perfect example of this application. After complete drying, the products are blended with a spice mill until a fine or granular powder is obtained. It is a practical way of recovering surpluses from the garden and building a more self-sufficient larder.
The essential thing is to achieve full dehydration (residual moisture below 5-10%). If residual moisture remains, the powder tends to compact into hard blocks and deteriorate more easily. This is why it is better not to be in a hurry and to check the friability of the product well before grinding it, if necessary by repassing the resulting powder in the dryer for a final hour.
10. Fruit leather or fruit bars
Apple, pear, banana, strawberry or apricot puree. Spread the mixture in an even layer of about 3-5 mm on the SiliDrop trays and dries to a soft, pliable, non-sticky sheet. It is a popular solution for those looking for simple snacks for the little ones, without having to resort to industrial products laden with added sugar and preservatives.
The temperature can remain between 45 and 50 °C. The time depends on the thickness and sugar content of the fruit. If too much juice or too much water is added for blending, the processing will be unnecessarily long. Better to start with dense, well-balanced purees, perhaps adding an apple as a neutral base and natural thickener thanks to pectin.
How to really improve the result
Beyond recipes, there are three rules that make the difference. The first is the uniformity of the cut. Pieces of different thicknesses in the same tray almost always lead to uneven drying, with the risk of storing slices in the pantry that are still moist and will ruin the whole batch. The second is not to overload the trays. Although the horizontal flow is powerful, the air must be able to circulate freely between the slices to remove the moisture; if the product is too compressed, the time will be longer and the quality will drop.
The third concerns conservation. A product that has been dried well, but closed while still lukewarm or in unsuitable containers, can quickly lose quality due to condensation. It should be allowed to cool completely at room temperature, checked for residual moisture and then stored in airtight glass jars, protected from air, light and heat.
Expert's tip: To check whether the product is really ready, do not rely on the tactile sensation when it is hot. Take out a slice, let it cool for a minute on the table and then try to break it. If it breaks with a sharp sound (crack), the drying process is complete. If it bends without breaking, it still needs time. This simple test will prevent unpleasant surprises in the pantry.
Temperature must also be interpreted with common sense. Higher does not always mean better. Sometimes it helps to speed up (such as the P4 programme at 68°C for meat or very watery products), but it can penalise colour, fragrance or consistency in more delicate products such as flowers and herbs. This is where experience really counts, and it is also why a specialised brand like Tauro Essiccatori has been working for over thirty years not only on the machine, but on spreading the culture of natural drying.
Those who start out often look for the perfect recipe. Actually, it is better to look for the right method for your kitchen, for the seasonality you have around you and for the result you want to achieve. Drying is at its best when it enters the routine with simplicity: a tray of apples in autumn, herbs in summer, tomatoes in times of plenty, crackers when you want to turn a healthy idea into an everyday gesture. From there, recipe after recipe, you build a more conscious larder and a kitchen that respects the timing of the earth.
We invite you to explore the entire Biosec range and our dedicated accessories to turn your every idea into a masterpiece of taste and health. We welcome you to the world of those who love the essence of food.
 Italian
  English
  German
  Spanish
  French
  Romanian