


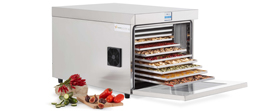


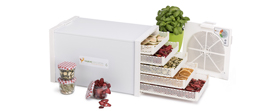


Wi-Fi Biosec PRO installation instructions
The dryer's interface can be viewed using an Android or Apple smartphone or tablet, by downloading a special app from the relevant online stores.
Android version
Apple version
You can connect to the dryer in 3 modes:
- Connecting directly to the wi-fi network generated by the dryer module
- Connecting to the dryer through an existing wi-fi network
- Registering a cloud account, associating the dryer with your account, then connecting via the internet with any internet-connected device
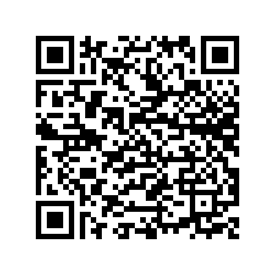
- Option 1: direct connection to the dryer:When first used, and as long as the module is not connected to any wi-fi network, the dryer generates its own network. To connect to the network generated by the dryer, use a device equipped with a wi-fi connection, such as a smartphone or PC, near the dryer, scan for visible wi-fi networks, select the one on the dryer, whose name (SSID) includes the final part of the MAC address indicated on the module's label, which is also on the dryer's manual, and enter the password, indicated as Wi-Fi WPA on the same label. Alternatively, scan the QR code printed on the label. We recommend using a smartphone and the APP, which was already installed before connecting the dryer to the network. If there are problems displaying the dryer's interface, deactivate the smartphone's data connection while leaving wi-fi active, and check that the wi-fi network to which it is connected is that of the dryer (some smartphones automatically disconnect from a network if it does not have internet access).
- Option 2: connection via existing wi-fi networkIt is possible to connect the dryer to an existing wi-fi network, such as a company or private network, as long as the wi-fi module is in range of the network. In order to store the network parameters (SSID name and password) and allow the dryer to connect, you must first follow option 1, connect to the dryer, then access the dryer interface and click on the appropriate button in the bottom right-hand corner (or on the network signal symbol if the dryer is already connected to an existing network). A window displaying the status of the device will open; clicking on "Search wi-fi networks" will perform a scan of the available networks. Select the one to which you wish to associate the dryer, type in the network password, and click on "Connect". If the procedure is successful, the dryer stores the settings and connects to the network every time it is switched on.
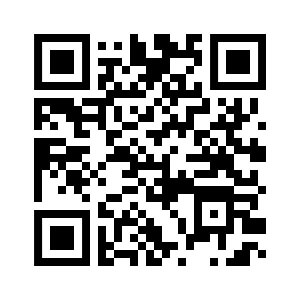
- Option 3: connection via the cloudBy registering the dryer to your cloud account, you can also access the interface from outside the wi-fi network, from any device. Before the dryer can be registered, it must be connected to the internet, via a wi-fi network, so follow the instructions in the previous two options, and make sure that the wi-fi network to which the dryer is connected has internet access, and that there are no devices, e.g. firewalls, inhibiting the dryer's access to the internet. When installing the APP, you will be asked to create an account, then click on "Register a new device" or select "Add device" from the app's menu, you will be asked to enter two details on the wi-fi module label or scan the QR code. If the procedure is successful, the dryer will be listed on the cloud portal page, and you will be able to access it easily. You can also change the name of the dryer, and add some other information, by clicking on the dots to the right of each device associated with the account.
Once you have connected to the dryer via one of the 3 methods described above, use a smartphone and the APP to access the dryer interface, selecting it from those available on the network, or associated with your account. If you prefer to connect via a PC, open a browser, such as Chrome or Edge, and type the IP of the dryer into the address bar. If you are connected directly to the wi-fi network generated by the dryer (see mode 1 below), the IP address of the dryer is 192.168.10.1, unless you have changed the IP base settings (see below). If, on the other hand, the dryer is connected to an existing wi-fi network, the IP address is provided by the network itself via the DHCP server, and in order to find out the IP address, you either need to access the server, or use the app, via which you can find out the IP address, on the network settings page (click on the wi-fi network signal at the bottom right). Please note that although most DHCP servers provide the same IP to connected devices, this is not guaranteed to remain unchanged, the address may change each time the dryer is switched on.
Dryer Network Settings
Clicking on the network signal symbol in the bottom right-hand corner takes you to a screen that allows you to view and change certain settings.
The name of the wi-fi network to which the dryer is connected, signal strength, cloud connection status and other information are displayed.
The 'Search wi-fi networks' button allows you to scan the networks visible to the dryer and associate it with one of them, knowing the password.
The connection information to the wi-fi network is then displayed, and via the 'DHCP settings' button it is possible to change it (we recommend leaving it unchanged if you are not familiar with these functions.
Under this information, the IP address of the dryer is displayed when the connection is made directly via the wi-fi network generated by the dryer itself, and it is possible to change the IP base, which by default is 192.168.10.x, to another one in case it conflicts with other devices.
The 'Save and Restart' button allows the settings to be saved and the wi-fi module to be restarted.
Finally, the wi-fi firmware version of the dryer is displayed, and it is possible to force an update via the 'Update' button. Note that if the dryer is connected to the internet via a wi-fi network, it will search for new firmware versions every time it is switched on and install them automatically.